Exploring The Bookings Calendar
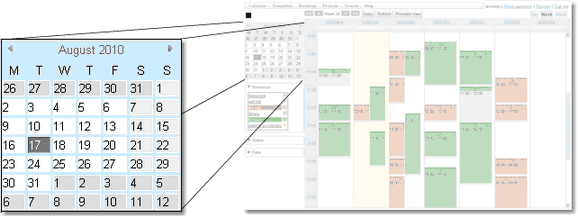
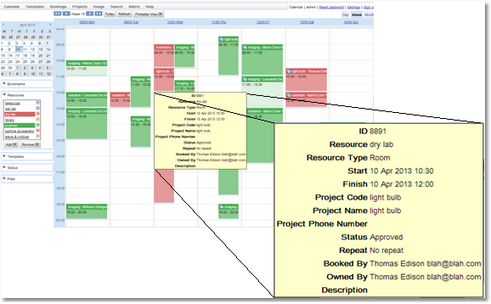
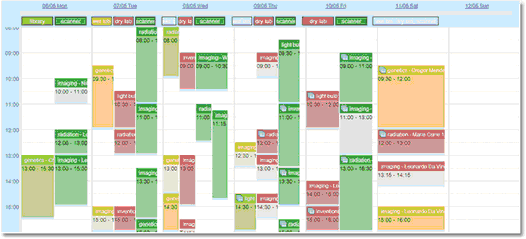
The colours on the Bookings Calendar are used to indicate the resource being booked, and the shade tells you whether a booking is a request or if it has been approved. A dark booking is approved, while a light booking is a request (although if tentative, cancelled or denied bookings are being displayed, they are displayed with stripes, Tentative: green stripes, Canceled: dark stripes, Denied: red stripes). This screen shot shows a week's bookings for two resources, the bookings for one resource in green and the other in red.
The navigator and filters/selectors can be removed/returned by pressing the arrow button found in the top left hand corner of the screen. This can be found on all calendars.
The month navigator quickly changes the date being displayed. Click on any date to display bookings for that date. This will work the same regardless of whether the view is for a day, week or month of bookings. Today's date is shown with a dark background.
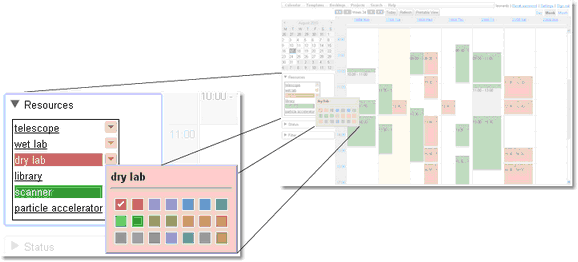
The Resource Selector shows the available resources, which ones are currently selected, and what their colours are. Click on a resources name to make it the only visible resource. Hold the shift or control key down and click on a resource, to also select that resource for viewing. If the background colour is visible, then that resource will be on the calendar.
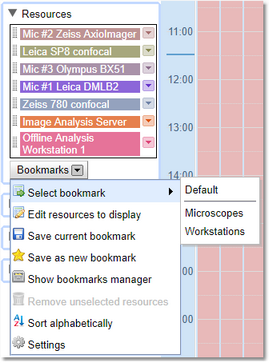
Use the Bookmarks dropdown to choose which bookmark is currently being viewed. Bookmarks can be system wide or on a per user basis. Click on any bookmark to see the resources that bookmark shows.For more information on how to set up and use bookmarks see the Bookmark Manager chapter.
If all the resources are not required in view click the Edit Resources to Display icon and use the Resource Selector to pick the resources to be shown on the list. For a description of how the Resource Selector works read the Resource Selection section at the end of this chapter.
|
The Save Current Bookmark icon will save the current selected resources as the current bookmark.
The Save As New Bookmark icon will save the current selected resources as a new bookmark.
The Show Bookmarks Manager will take the user to the Bookmarks Editor.
The Sort Alphabetically icon will sort the resources alphabetically in the bookmark and on the calendar.
The Settings icon allows the following changes
Setting |
Effect |
|---|---|
Allow Reordering by dragging Resources |
Adds the drag and drop icon to the left of the resource name so they can be reordered by dragging and dropping. |
Toggle Resource on click. |
This changes the behavior so that clicking a resource hides it rather than hides everything else. |
To change the colour used for any resource, click the button to the right of the resource name. This shows a pop-up where you can select from the available colours.
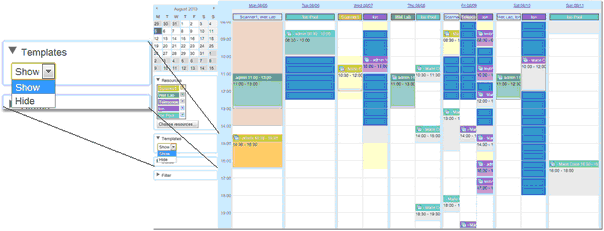
The Time Templates option allows you to decide whether to show or hide basic Time Template information for all resources. This allows the user to quickly see for a resource which Time Templates are being used. Areas in red are either in the past or bookings are not allowed, in yellow, bookings may be requested awaiting acceptance although a warning may be issued, in green when bookings will be automatically accepted or white where no Time Template is present. (The colours are the defaults and may be changed in User Settings. In the example below the Requested colour has been changed to blue to make those areas stand out from the warning areas.). If the calendar shows Time Templates for multiple resources in the same column, then it will show the background colour to represent the most lenient restriction for all the resources it's showing Time Templates for (no Time Template being the least restrictive). Which means if the background is red, then none of the resources displayed in that column can not be booked. If it's white, yellow ( or blue in the example below) or green, then the user will be able to book for at least one of the resources displayed in that column. Moving your cursor over an area where Time Templates are active, for the current user, will provide a tool tip with any message(s) the administrator has defined for the Time Template(s).
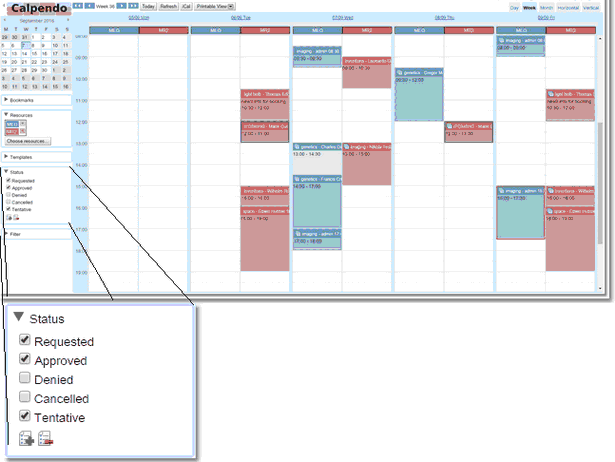
Normally, the bookings calendar displays bookings that are approved, tentative or requested, but ignores denied or cancelled bookings. Click on the Status label, to open up the Status Selector. Here choose the statuses to be displayed.
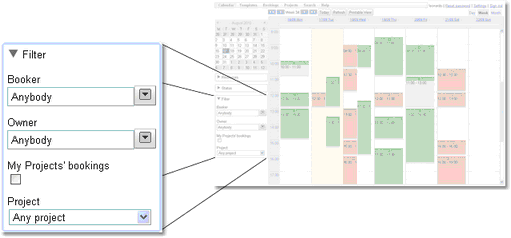
Click on the Filter label to provide more detailed filtering options.
Using a filter can restrict which bookings are displayed by selecting who booked or who owns each booking.
Click My Project's Bookings to show only bookings for projects that the user is associated with.
Select a particular project to show only bookings for that project.
|
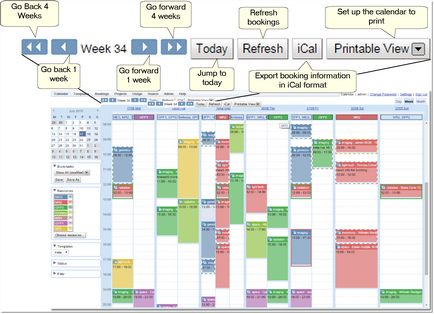
The button bar at the top of the calendar allows movement through time, refreshes the currently displayed bookings, exports iCal information or switches to a view suitable for sending to a printer.
The forwards and backwards buttons change how far forwards and backwards they go depending on which view is currently shown, day, week or month view.
In a day view, the buttons go forwards or backwards one day or one week.
In a week view, they go forwards and backwards one week or one month.
In a month view, they go forwards and backwards one month or one year.
|
The Today button will always jump to today.
The Refresh button will refresh the display and find any changes that have been made since bookings where last fetched.
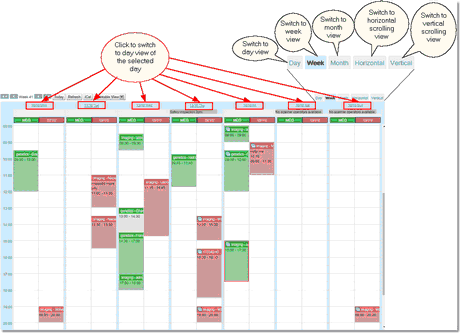
At the top of each day in the week view is a label showing the date. Click on that date to go to a day view of that date. There's also a tab selector on the far right to choose the day, week or month view.
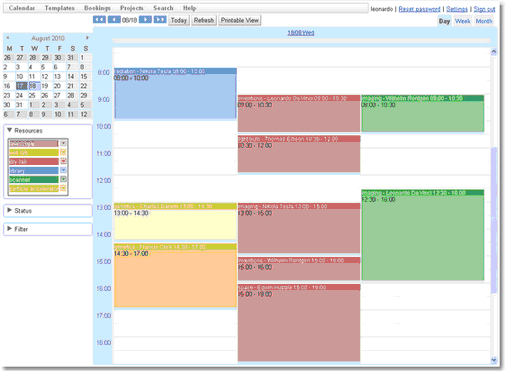
This is a day view. Bookings for different resources may display in the same column, as long as they don't conflict with each other. This is shown in this screen shot by the yellow and blue bookings.
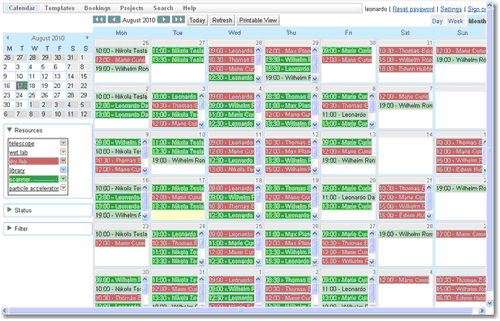
This is a month view. It can get very cluttered if bookings are not filtered.
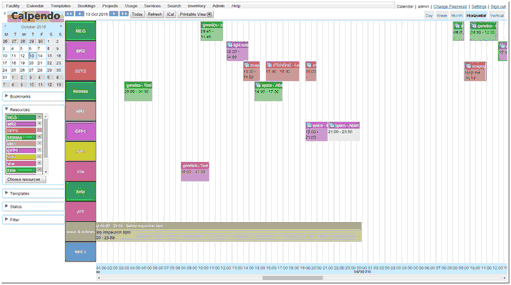
This is the Horizontal Scrolling View. This allows you to see a large number of resources at the same time and scroll through time. The number of days shown at any one time is defined in User Settings.
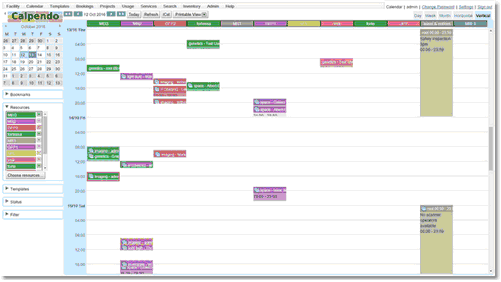
This is the Vertical Scrolling View. This allows you to see a large number of resources at the same time and scroll through time. The number of days shown at any one time is defined in User Settings.
When the mouse hovers over a booking, a tool tip will appear which shows some of the details for the booking. More information can be found by clicking on the booking to get the booking pop-up, but the tool tip shows the most important information. This tool tip information may be configured by the administrator in the Resource Editor.
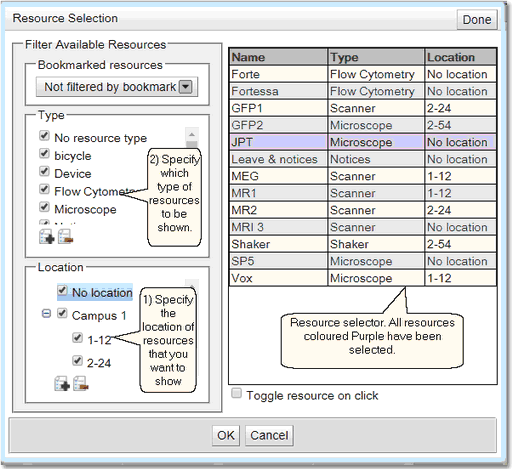
When dealing with a number of resources there will be times when a user will only need to see some of the available resources. The Resource Selection pop-up allows users to determine which resources will be shown.
First of all select the location the resources come from. Selecting a top level location will automatically select all the lower level locations associated with it, the reverse does not happen. Lower level locations can be selected without their upper level selected.
Then select the types of resources required to be viewed.
|
|
All these resources will appear in the Available Resources box. Select the resources in this can be done individually, or use the ctrl key to select multiple non adjacent resources or the shift key to select multiple adjacent resources. (i.e use the mouse to select the first resource, hold the ctrl key down while using the mouse to select other resources).
Toggle resource on click. By default when you click on an individual resource all other resources will be unselected, if this choice is ticked then the opposite is the case, each resource clicked individually will be added to the current selection list.
When happy with the list of Available Resources click the OK or Done button.
Note: If a resource is selected in the Available Resources area and it is removed from that box because either its type box, or its location box are unticked, then the resource will be unselected. |
|
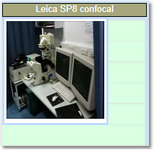
If the administrator has set it up a user can see a picture of the resource by moving the cursor over the column header or the resource in the list of resources in the filter section.
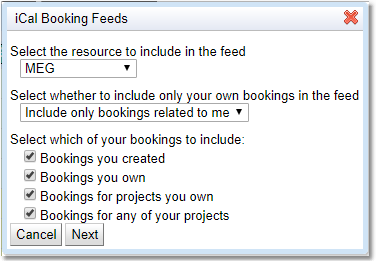
When exporting iCal information the user needs to decide if they want to export information on a single resource or all resources, and whether they want bookings related to themselves or other peoples bookings as well. If they want bookings related to themselves they can also decide which of the relationships they want to choose. Once these options have been chosen a link will appear at the bottom of the booking feed box, copy and paste this link to the calendar application. The frequency of updates to the calendar may be determined by the calendar application itself, if not, it is every hour.
If there are any Permissions which stop users from seeing parts of a Booking these may effect the iCal feed. For instance a Permission which stops ical_User from seeing the name of the Booker on bookings they have not booked will mean that all bookings will not be seen by the feed as when the request is made it is impossible to know who is making the request and therefore it fails.
Once the resource and booking combinations are selected then choose next to get the URL

Generate URL will create a new URL to replace the existing one. Show Booking Feeds will take the user to a page which will display all the current feeds from this Calpendo.
The link to be copied is made up of two parts, the first part is extracted from Admin->General Preferences->Email->Emailed Base URL and then the "downloads?..." section is appended. Please make sure that the base URL is set-up correctly.
In the bookings calendar you can bring up a printable view. Use the pull down to determine the hours you wish to view, and then click on the OK button.
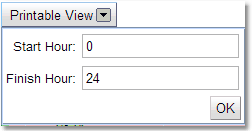
The Printable View you get will be the same type of view as you were originally in, day, week or month, but with only the hours requested being shown. To exit the view either press the browser back button, or left click the mouse anywhere in the window.
Here is an example of a weekly view showing from 08:00-16:00.


