Example Permissions
Example 1: Anybody May Create A Booking Request
A booking is a Calpendo object that has a status, start and finish date and a few other properties. This example will create a Permission that authorises anybody to create a booking when the booking to be created has its status set to Requested. Note that by creating a Permission like this, it doesn't influence what happens when somebody tries to create a booking whose status is set to something other than Requested.
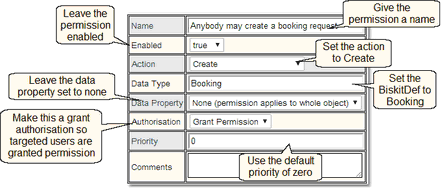
1.Create a Permission that applies when a booking is Created and give it a name
2.Add a condition: Status is Requested
3.Under Applies To, ensure Include Everybody is ticked
4.Under Does Not Apply To, ensure Exclude Nobody is ticked
5.Save the Permission.
Example 2: Anybody Can Modify A Booking Request They Created If The Booking Is Still A Request
This example shows the difference between using a Old Value condition and an New Value condition. We need a Permission that will allow somebody to modify a booking if they created it and the status was set to Requested before they tried to change it, and its value would still be Requested after the change.
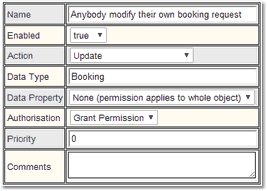
1.Create a Permission that applies when a booking is Updated and give it a name:
2.Add a condition: Status is Requested. Note that for an update, to put a condition on the value after the update, then use a New Value type of Condition.
3.Add a condition: Status was Requested. Here, we use a Old Value type of Condition to put a condition on the value that the status had before the update.
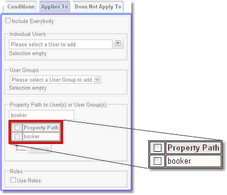
4.We now need to limit the Permission to applying to whomever created the booking. This is easy because each booking stores a record of who booked it in the booker property. To do this, go to the Applies To tab, untick Include Everybody and then add a property path to booker.
5.Save the Permission.
Example 3: Admins May Create Or Update Anything
This example shows how to use User Roles to decide who gets permission to do something, as well as showing how to create a Permission that applies to every Biskit Type. Use a Permission like this when the Admin Role needs to bestow the ability to create or update whatever they like. The Permission can still be revoked in some circumstances by using a Permission of a higher level elsewhere that overrides the Permission we're creating here.
To achieve the ability to let the administrator create or update anything, we need to create two separate Permissions, one for the Create and one for the Update.
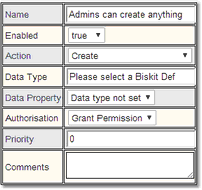
1.Create a Permission that applies when Anything is Created and give it a suitable name. Leave all the other options at their default values:
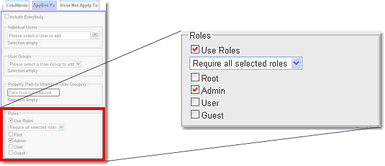
2.Under Applies To, untick Include Everybody, select Use Roles and tick the check box next to Admin
3.Save the Permission.
4.Repeat step 1, but this time set the Action to Update and set the Permission's name accordingly.
5.Repeat of steps 2 and 3 above for this Update Permission.
Example 4: Only Allow Specified Users To See The Price Being Charged For Use Of A Resource
In Calpendo, a resource represents a real-world item that can be booked. The price to be charged for its use is project specific, and stored in the Cost Per Session property of a Project Resource Setting. This example is therefore designed to stop anybody apart from one particular administrator being able to view this price.This serves to demonstrate how to protect individual properties and how to apply Permissions to individuals. This is known as a Property Level Permission.
There are two ways we can set up Permissions to achieve the result we want, depending on what we'd like to achieve. We can create a Permission for each methodology:
•Authorise the user Admin to read the the Cost Per Session, but say nothing about whether other users can read it.
•Deny everyone other than the user Admin from being able to read the Cost Per Session, but say nothing about whether Admin can read it.
When a Permission says nothing about whether a user is granted or denied permission, then you rely on other Permissions to specify what you want. This is the way that multiple Permissions are superimpose to get the result required. To show how this works, we'll go through each of the options above in turn.
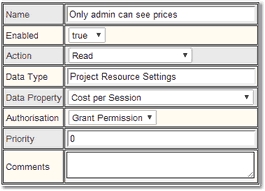
1.Create a Permission that applies when a Project Resource Setting is Read and set the Data Property to Cost Per Session
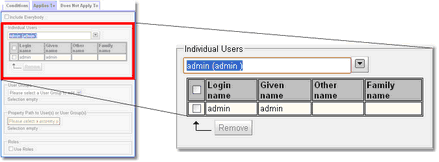
2.On the Applies To tab, untick Include Everybody and under Individual Users, select one or more users. In this example, a user called Admin has been added.
3.Save the Permission as it is, and with the default values of Authorisation being Grant Permission, it means that the targeted users (in this case, the user Admin) will be granted permission when trying to view the Cost Per Session. This Permission says nothing about whether other users can read Cost Per Session.
If you now wanted to change the Permission so that it says nothing about whether Admin can read Cost Per Session, but that it denied permission for all other users, follow the following steps:
4.Press the Edit button (unless you didn't actually save it and so it's still shown in an editable form).
5.On the AppliesTo tab, tick Include Everybody.
6.On the Doesn't Apply To tab, untick Exclude Nobody and add Admin to the list of individual users.
7.In the main Permission details, change Authorisation to Deny Permission.
What we've now done is to target everybody apart from Admin. We've made the Permission negative, so that the targeted users will be denied permission to read Cost Per Session.
Example 5: Approval Of A Booking Requires An Admin
In this example, we are going to create a Permission that allows anybody with the Admin Role to change a booking's status to Approved. We will also add a condition to make sure we're matching the situation where an administrator modifies the status themselves, rather than where the status is modified indirectly as a result of moving the booking to a period in which a Time Template (another Calpendo concept - the details of which are not important here) has approved the booking.
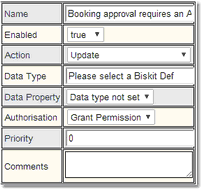
1.Create a Permission that applies when a booking is Updated, give it a name, and make it Grant Permission.
2.Add a condition: Old value Status was not Approved
3.Add a condition: New value Status is Approved
4.Add a condition: New value templateApproved is false. The templateApproved property is set automatically when a booking is approved by a Time Template and so we can use it to detect how the status was changed.
5.Under Applies To, untick Include Everybody, select Use Roles and then add Admin.
6.Save the Permission.
Example 6: No One Can Email Password Details
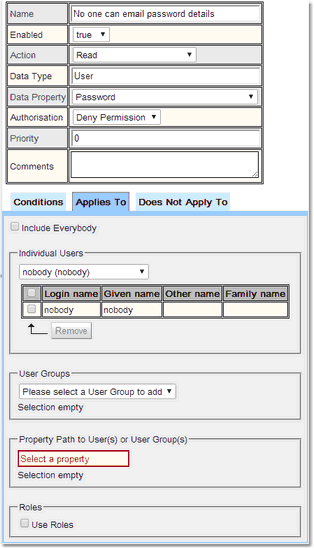
In this example, we are going to create a Permission that stops everybody from putting the value of the password property of the User Biskit Type into an email. To do this we will be using the special user nobody
1.Create a Permission that applies when a User is Read, give it a name, select the property Password, make it negative (Authorisation is Deny Permission).
2.Under Applies To, untick Include Everybody, select Individual Users and then nobody.
3.Save the Permission.
Use this mechanism on any information you do not want sent by e-mail.
Example 7: Hiding Resources And Booking Properties
Sometimes the administrator may want to create resources that only some people may access, or define properties on a booking that some people shouldn’t be allowed to see. This is achieved by setting up permissions that control who can access what.
To hide some bookings from some people:
•Deny them READ permission on the bookings they should not be able to see.
If you want to hide a booking property from some people, then:
•Create a property-level Booking permission that denies them READ rights on that property
•Create a separate permission for each property you need to hide
If you want to hide a resource from someone, here is the list of Permissions that need to be set up:
•Deny them EXISTS permission on the resource
•Deny them READ permission on bookings for that resource
•Deny them READ permission on templates for that resource.
To set up the first permission.
Action |
Exists |
Data Type |
Resource |
Condition |
Value of self equals Specified value (name of resource) |
Self is property of type Biskit that points to the Biskit owning the property. By using the self property rather than the name property the primary key of the Biskit is stored in the Condition and not the name, therefore if the name changes the Permission will still work.

