Modifying Users
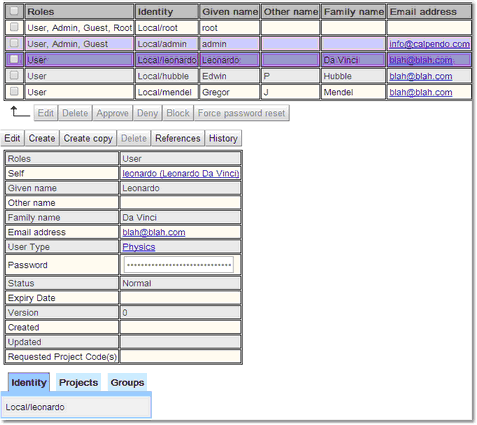
To see, change or delete users, go to a list of users. Either use the dedicated User Search page, or use Data Explorer as explained in the User Search chapter to get the list.
Once the list of users has been returned they can be modified. Depending on which page was used to get the list of users either go to the Data Explorer or Search pages for more details on editing and saving. Described below is how to specifically change a user's project associations and user groups.
Once the list of users is displayed, click on the user whose password needs to be changed.
Click on the Edit button, once in edit mode any of the users details may be changed. If changing a users password it may be an idea to change the Status to Password must be reset at next login, in order that the user must change their password again when they log in. Once the details are changed click Save (this will have replaced the Edit button).
Changing A User's Project Associations
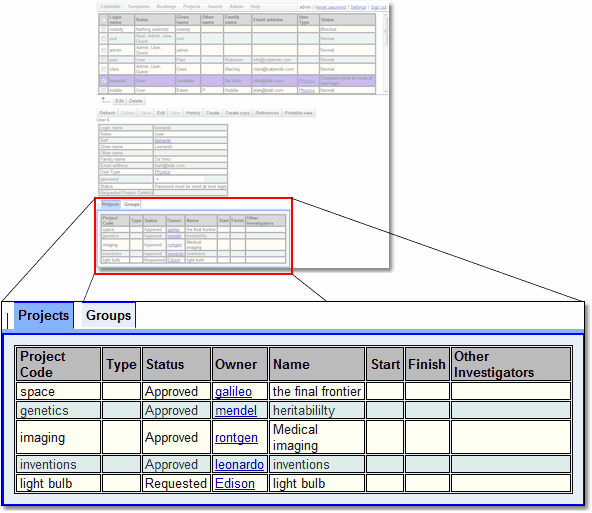
With a user's detail showing, as described above, the user's project associations are shown in the Projects tab at the bottom of the page.
In edit mode, the Projects tab changes to this:
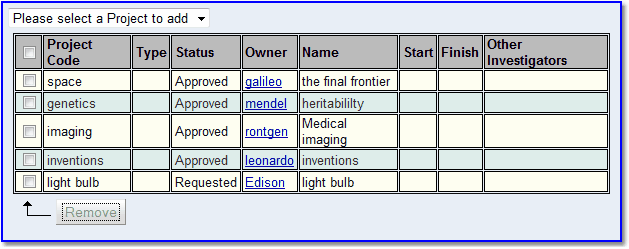
This has its own checked button bar:
1.Tick the check boxes of any project to be removed.
2.The Remove button will change so that it is not greyed out once a check box is ticked.
3.Press the Remove button to remove the ticked projects from the user's list.
To add a new project, select it from the drop down. Note that the way the drop-down is formatted for adding new projects will change depending on the number of projects that exist. For a small number of projects, you get a simple drop down. When the number grows, then you get both a drop-down menu with all projects, but also a text box in which to type the project name. As the name is typed, it shows a selection of projects that match.
The user's association of projects is only changed once the Save button is pressed, in the regular button bar. Note that the projects themselves are also changed because they know which users are associated with them.
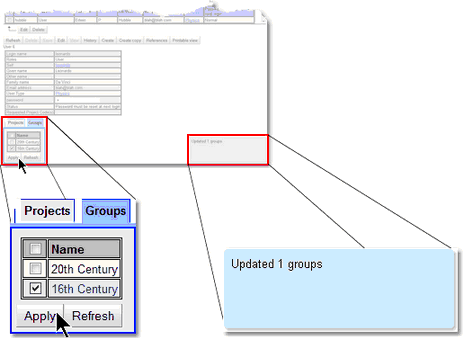
To see which user groups a user is a member of select the user from the list of users, as described by How To Edit A Single User above. The tab panel at the bottom of the page shows the user's projects and group memberships. Select the Groups tab and a list of all user groups is seen, with a check box next to each group the user is a member of.
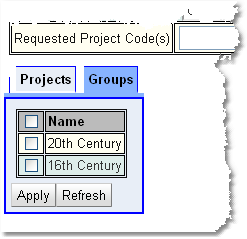
Note: the user's details do not need to be in edit mode in order to change the user group membership. That's because the user group membership is not a property of the user itself, but of the user groups. To modify the group membership for the selected user:
1.Tick or untick the groups. The groups ticked are the ones the user is a member of. Tick the check box in the header row if all the check boxes are to be ticked or unticked.
2.Press the Apply button when finished.
|

