Creating A Set Of Biskits (Attachments)
An example of creating a Set of Biskits for this example we will create a Set of Attachments, to store a number of documents.
1.Go to Admin->Bakery.
2.Click the + next to Biskit Def to open the Biskit Tree
3.Select any Biskit.
4.Press the Create button to create a new Biskit and enter edit mode. First we need to create the BiskitDef to hold the attachments.
5.Update the meta-properties of the Biskit.
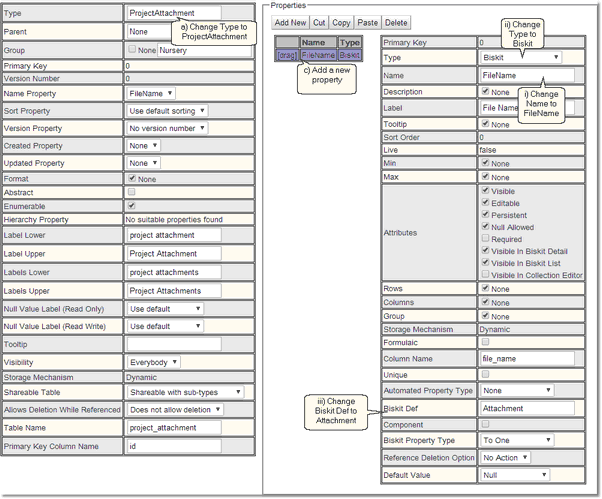
a)Change Type to be the new BiskitDef name, in this case ProjectAttachment.
b)Change Group to help find all the new BisketDefs using the Filter Biskit Group... button
c)In Properties Add New
i.Change Name to attachment
ii.Change Type to Biskit
iii.Change Biskit Def to Attachment
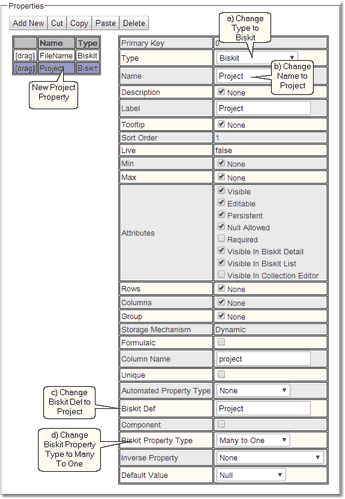
6.Create a new property. a)Change Type to Biskit. b)Change Name to project c)Change Biskit Def to Project d)Change Biskit Property Type to Many To One. e)Make sure Required is ticked (not shown in this diagram) |
7.Press the Save button. There will be an error:
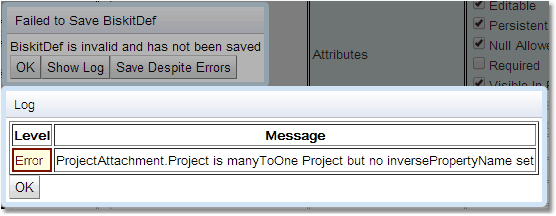
Check the error by pressing Show Log. If the error is complaining about a no inversePropertyName being set press the OK button, and then the Save Despite Errors button.
8.Select the Project BiskitDef, press the Edit button to get back into edit mode.
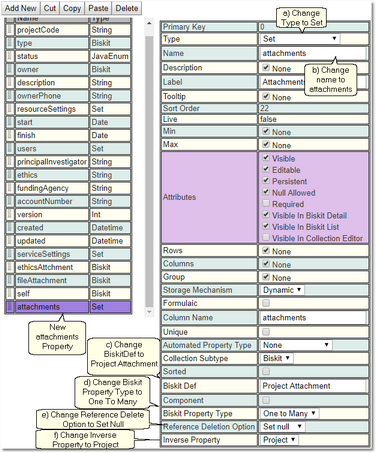
9.In Properties Add New. a)Change Type to Set. b)Change Name to attachments c)Change Biskit Def to Project Attachment d)Change Biskit Property Type to One To Many e)Change Reference Deletion Option to Set Null f)Change Inverse Property to project |
10.Press the Save button, and this should save without an error.
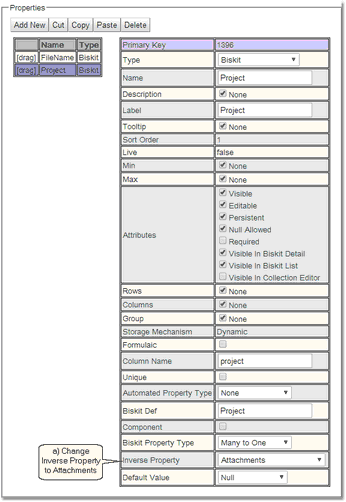
11.Select the Project Attachment BiskitDef, press the Edit button to get back into edit mode.
13.Press the Save button.
14.If there are no errors the database will need to be updated:
a)Press Update DB Schema to implement changes in the DB, and then run the script to apply the changes
b)Press Validate Biskits button to check the database Biskits.
c)Press Reload Database Configuration, to load the new database into Calpendo
d)Refresh the browser

