Email Workflow Action
Sets up an email to be sent.

Returns emailBody, emailSubject, errorMessage, numberOfRecipients and users for use with subsequent Actions which holds information about the email.
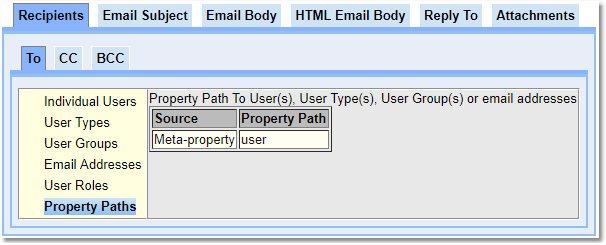
Individual Users
This lets you specify particular users that should receive the email.
User Types
If you specify one or more User Types, then any user with one of those User Types will receive the email.
User Groups
Any user in the specified groups will receive the email.
Email Addresses
A list of email addresses who will recieve the email.
User Roles
Users can have multiple roles. Select any number of roles by ticking the check box next to the role, and then choose with the drop-down whether the email is to go to users that have all of the selected roles, or users that have any of the selected roles.
Property Path
As an abstract concept, the property path may at first appear confusing. It is used when the data that is accessed contains a reference to a User, User Group or User Type, or else contains a reference to something that contains a reference to a User, User Group or User Type.
Send To User Performing Action
An Email Action is triggered as part of a Workflow. The Workflow could be triggered by something a particular user did. If that user is required to receive the email, then use Meta-property user.
Insert
This allows the user to insert data into the subject line from any previously run Workflow Actions.

The Insert button that appears in the tab enables dynamic text to be inserted that will be replaced when the email is generated. For example, suppose the email subject is required to be New Calpendo user request by X where X should be replaced by the login name of the new user. Use the Insert button to provide all the possible information that could be inserted gathered from previously run Workflow Actions.
New And Old Data
This means that they allow the insertion of text from the object that was created, updated or deleted. In the case of an update triggering the email, then the New option is linked to the properties on the object after the change has taken place and the Old option is linked to the properties on the object before the change took place.
For date properties extract just the date or just the time to give more control over the content of the subject.
When the action triggering the email is either Create or Delete, then the text inserted by the New and Old options will generate identical results.
Metaproperties Date
This inserts the text [DATE] and when the email is generated, this inserts the date and time that the email is generated.
The AuditLog Data
Whenever data is created, updated or deleted, there is an AuditLog entry created. This option allows the extraction of information from the audit log entry. This is not normally useful, but is required for a special case. When a user registers, there is normally an Email Action that lets an administrator know that a user has just registered. That email contains two URLs - one that will automatically approve the user, and one that will automatically deny the user. For this to work, Calpendo needs to make sure that when the relevant URLs are accessed, nobody else has already changed the user's properties. So, the Email Action uses the audit log information to add the AuditLog's identifier. This is a unique identifier for the audit log entry. Calpendo can then examine the audit log and check to see if there have been any changes to the user since the time the email was generated; only if there have been no subsequent changes will the user be approved or denied.
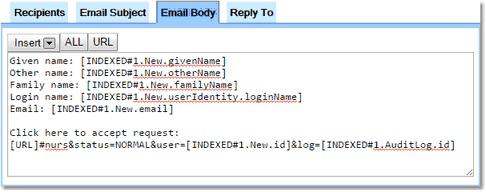
The body of the email works just like the subject does. The only differences are that there are extra buttons, for additional magic text, and the editor allows multi-line text instead of single-line text.
The All Button
ALL generates output that shows every piece of data from all previously run Workflow Actions. The format this generates is not particularly user-friendly and can have a lot of data, and so if this is used, be careful about who receives such emails.
The URL Button
This inserts a URL to your Calpendo. Sometimes, it is required to provide a link in an email to a particular page. This can be done by putting the relevant page information after the main URL. For example, if a Project has been changed, then set up a link like this:
[URL]/#ba&type=Project&action=view&id=[NEW.id]
In this case, [URL] is replaced by the main URL, then #ba&type=Project&action=view links to a page that is told to display Projects and not other Biskit types. Finally, the &id=[NEW.id] specifies the identifier of the particular Project that was changed.
The easy way to work out how any URL like this should be formatted is to first go to the relevant page and see what URL Calpendo uses, then replicate that within the Email Action, replacing parts as appropriate with dynamic text.
It should be noted that it's not normally useful to insert a URL into an email's subject. However, the same URL... button is also used for the content of an email.
Attachments
When setting up an email in the Workflow Manager, if a Biskit Attachment is referenced within the text, the UI will insert the attachment name into the text of the email body or subject. This will also cause the Attachment to be attached to the email as well.
If the path inserted into the email is modified so that instead of selecting the attachment name, the Attachment itself is selected.
For example, selecting an Attachment when building the content of the email will insert a path similar to index#1.attachment.name. If the path is modified to index#1.attachment, the email still has the Attachment attached to it, but no text is added to the email's body or subject.
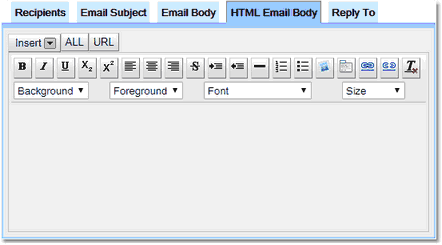
The HTML Email Body of the email works just like the Email Body does. The only differences are that there are extra options,to create the body using HTML rather than straight text.

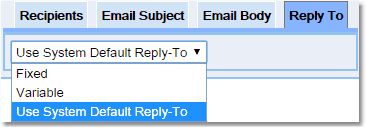
Allows the user to either use the system default for Reply To (Global Preferences), or insert their own Reply To address.
Allows the user to either use the specify an attachment or list of attachments for the email..
Dealing With Sensitive Data In Emails
If there is data that any user shouldn't be able to put into an email because of confidentiality or sensitivity but the user still needs to be able to access the information in Calpendo then set up specific Permissions for data. There is a special user called nobody which is used for this purpose. In the Permissions page, for a property or Biskit, create a Permission with Action set to Read, Authorisation to Deny Permission and Applies To to nobody, so that the property or Biskit can still be read by the user within Calpendo but cannot be added to an email. Read the Permissions section for more details on setting Permissions.
If emailing data is a problem create a Templated Text Workflow Action (which does not check against nobody), to generate the text required and use that as input to the Email Workflow Action.
Properties Available for Child Actions To Use
The following properties are available for use in any child or descendant action:
Properties |
Notes |
|---|---|
emailBody emailSubject emailMessage numberOfRecipients |
Properties defining the email information. |


